#
Reset 120 days RDS evaluation period
#
Overview of resetting the grace period
Additionally, for production systems, resetting the 120 day grace period should only be done for systems that are not in production, as you should have proper licensing installed for production use.
To reset the grace period, there are actually just 3 steps involved:
- Change permissions on the RCM > GracePeriod key
- Delete the “Timebomb” registry entry
- Reboot the server

Now that we have level-set, once you have your snapshot or other backup created, you need to navigate to the following key location on your RDS server:
Computer\\HKEY_LOCAL_MACHINE\\SYSTEM\CurrentControlSet\\Control\\Terminal Server\\RCM\\GracePeriod
#
Change Permissions on the RDS GracePeriod key and delete the key
Open a command prompt, and type regedit. After you have navigated to the key documented above, right-click GracePeriod and select Permissions.
[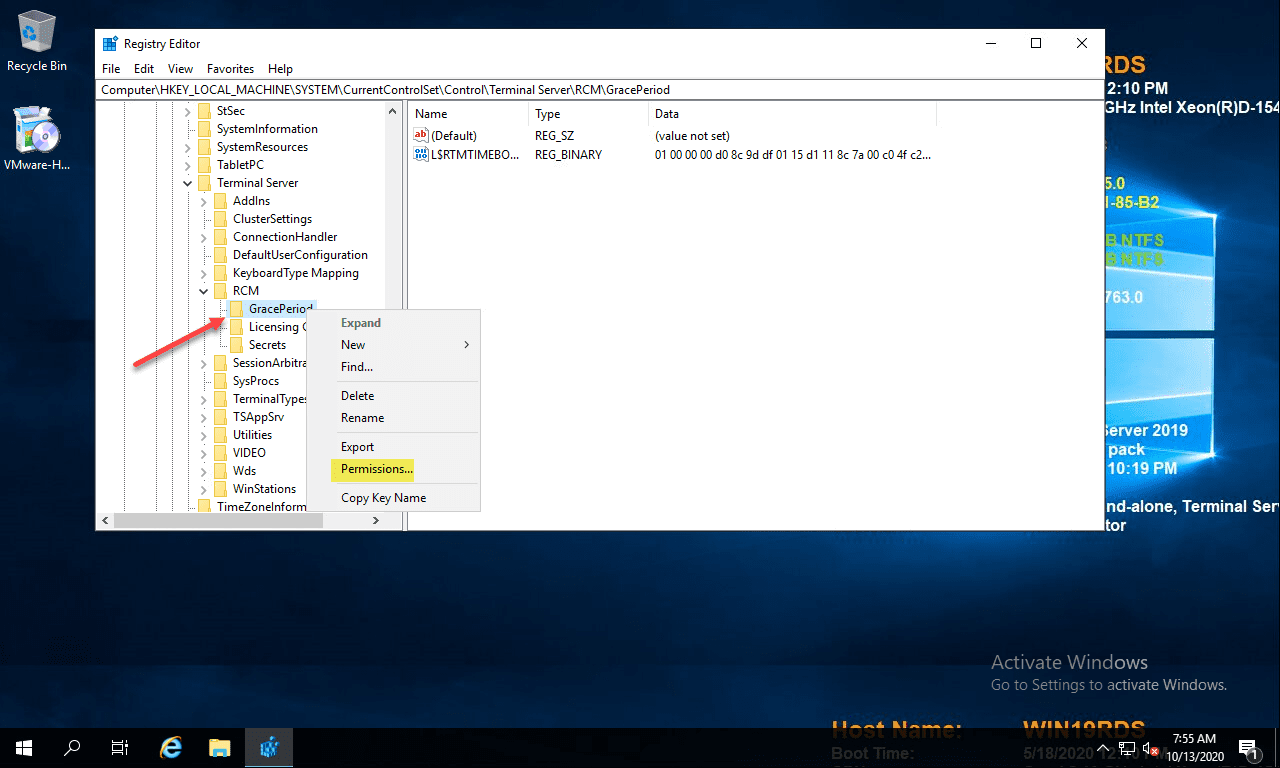
Navigate to the RDS GracePeriod key
[
For obvious reasons, there are no default permissions on this key for even Administrators. So you have to first take ownership of the key before you can delete the timebomb value. Click the Advanced button on the permissions dialog box.
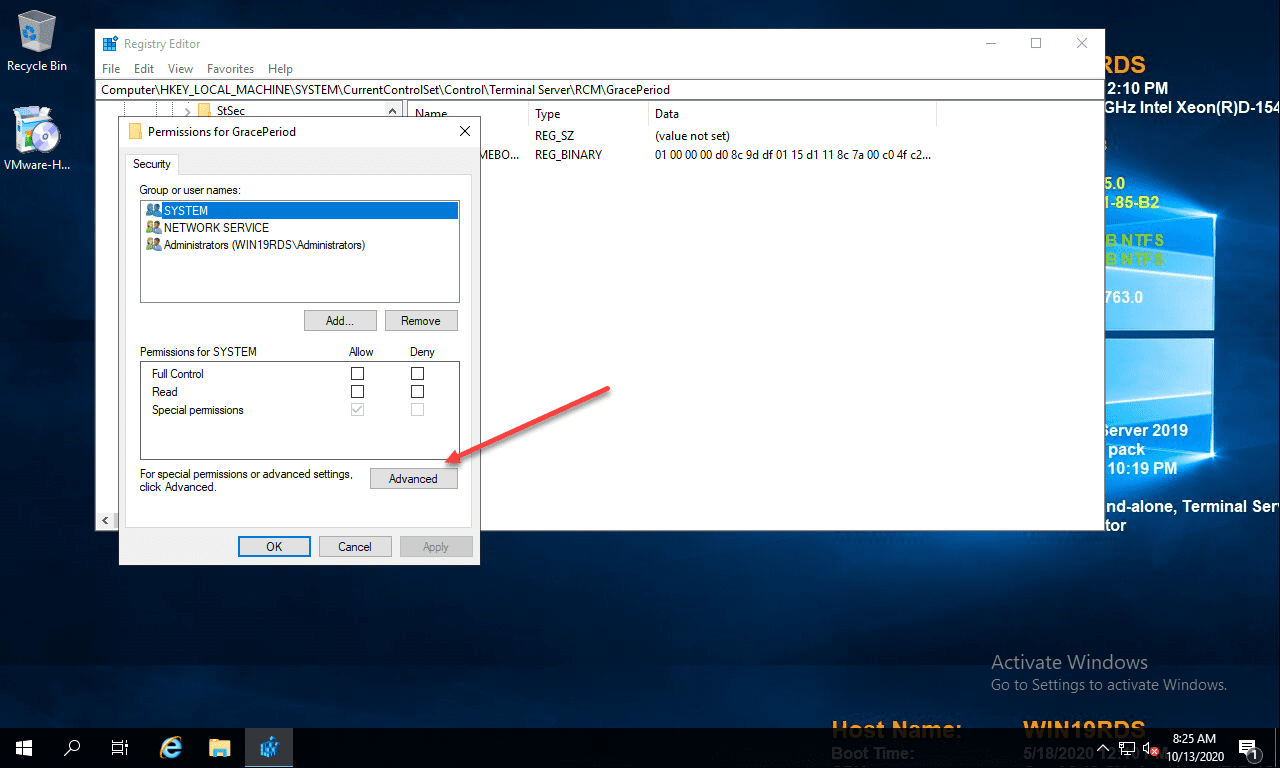
Navigate to the Advanced permissions properties
[
Click the Change button next to the Owner.](https://www.virtualizationhowto.com/wp-content/uploads/2020/10/Navigate-to-the-Advanced-permissions-properties.png)
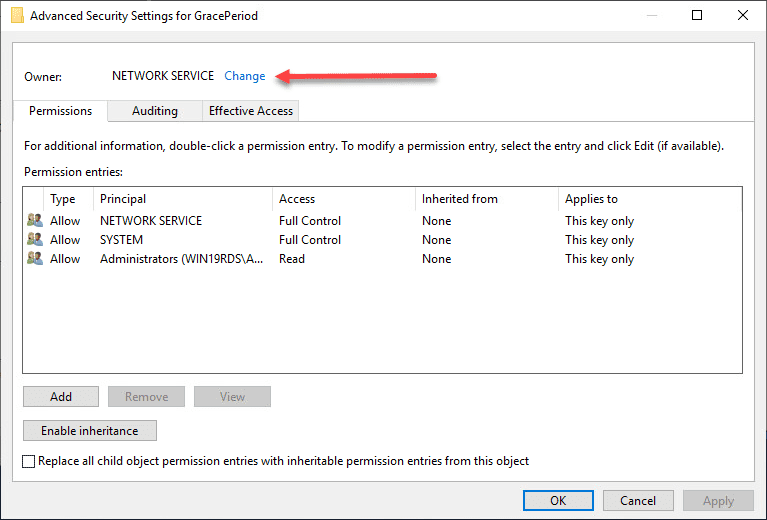
Change the ownership of the registry key
Here I have selected local administrators group as the owner of the key. However, you will want to choose whichever user/group you want to use to delete the registry key. Select the options to replace owners and replace all child object permissions.
[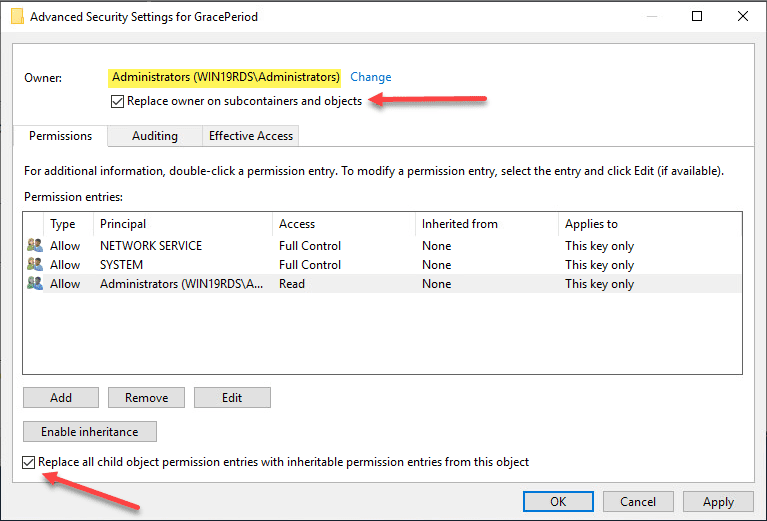
User for ownership selected and set to replace permissions on child objects
[
Confirm the replacement of permissions on the registry key.
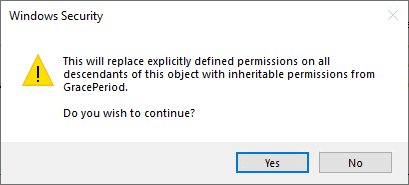
Confirm replacing permissions
](https://www.virtualizationhowto.com/wp-content/uploads/2020/10/Confirm-replacing-permissions.png)
[
Now that we have changed ownership on the key, we can actually set permissions without getting permissions errors. Here I am granting administrators full control on the key.
](https://www.virtualizationhowto.com/wp-content/uploads/2020/10/Confirm-replacing-permissions.png)
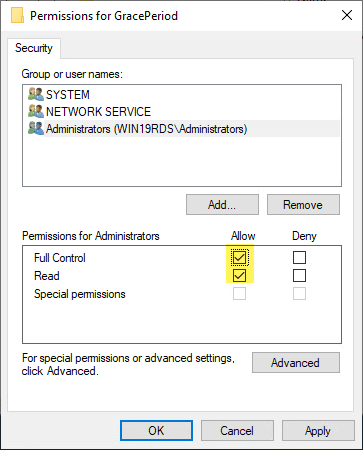
Change permissions for the user you want to be able to delete the key
Now, with permissions set, right-click the timebomb value in the GracePeriod key and Delete.
[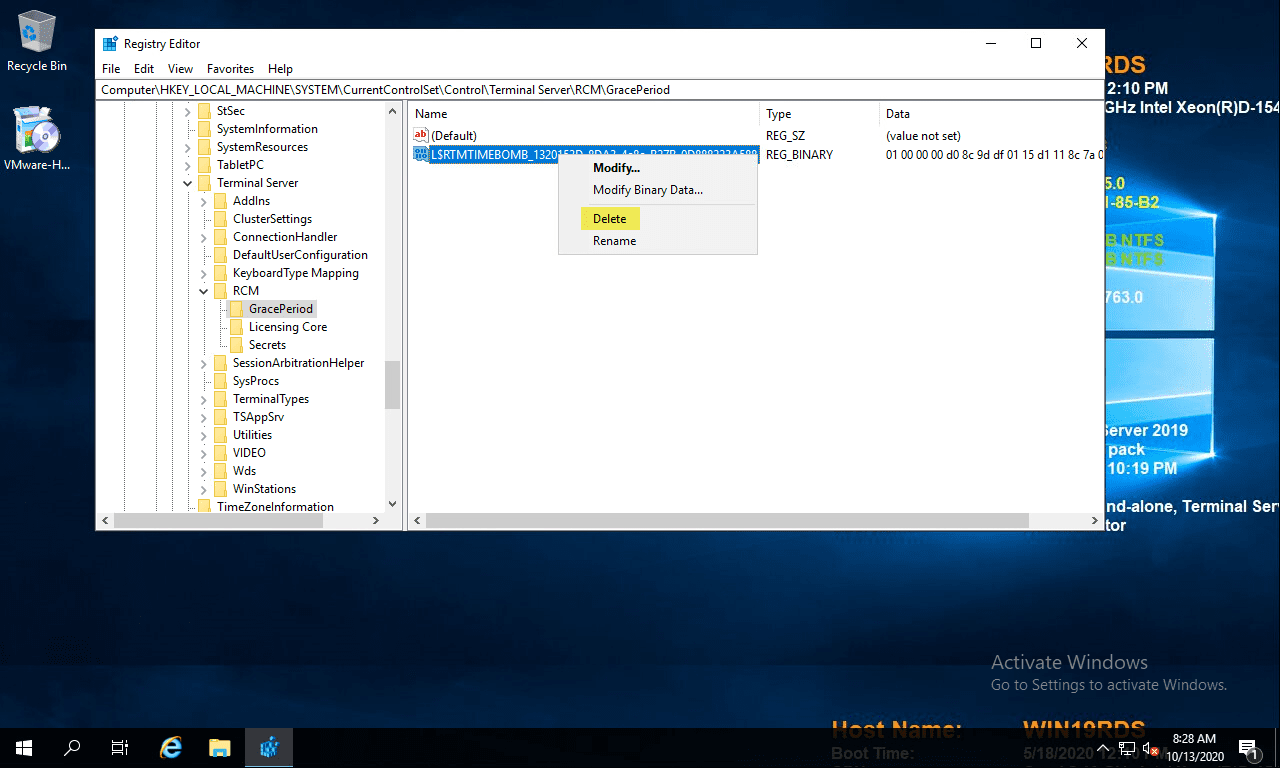
Delete the timebomb key
](https://www.virtualizationhowto.com/wp-content/uploads/2020/10/Delete-the-timebomb-key.png)
[
Confirm the deletion of the registry entry.
](https://www.virtualizationhowto.com/wp-content/uploads/2020/10/Delete-the-timebomb-key.png)

Confirm deletion of the timebomb key in the registry
[
Next, the only thing left to do is reboot your server. Once the server is rebooted, you can enjoy once again having the full 120 day grace period for your RDS server in the lab environment.
](https://www.virtualizationhowto.com/wp-content/uploads/2020/10/Confirm-deletion-of-the-timebomb-key-in-the-registry.png) Source: https://www.virtualizationhowto.com/2020/10/reset-120-day-rds-grace-period-on-2016-and-2019/